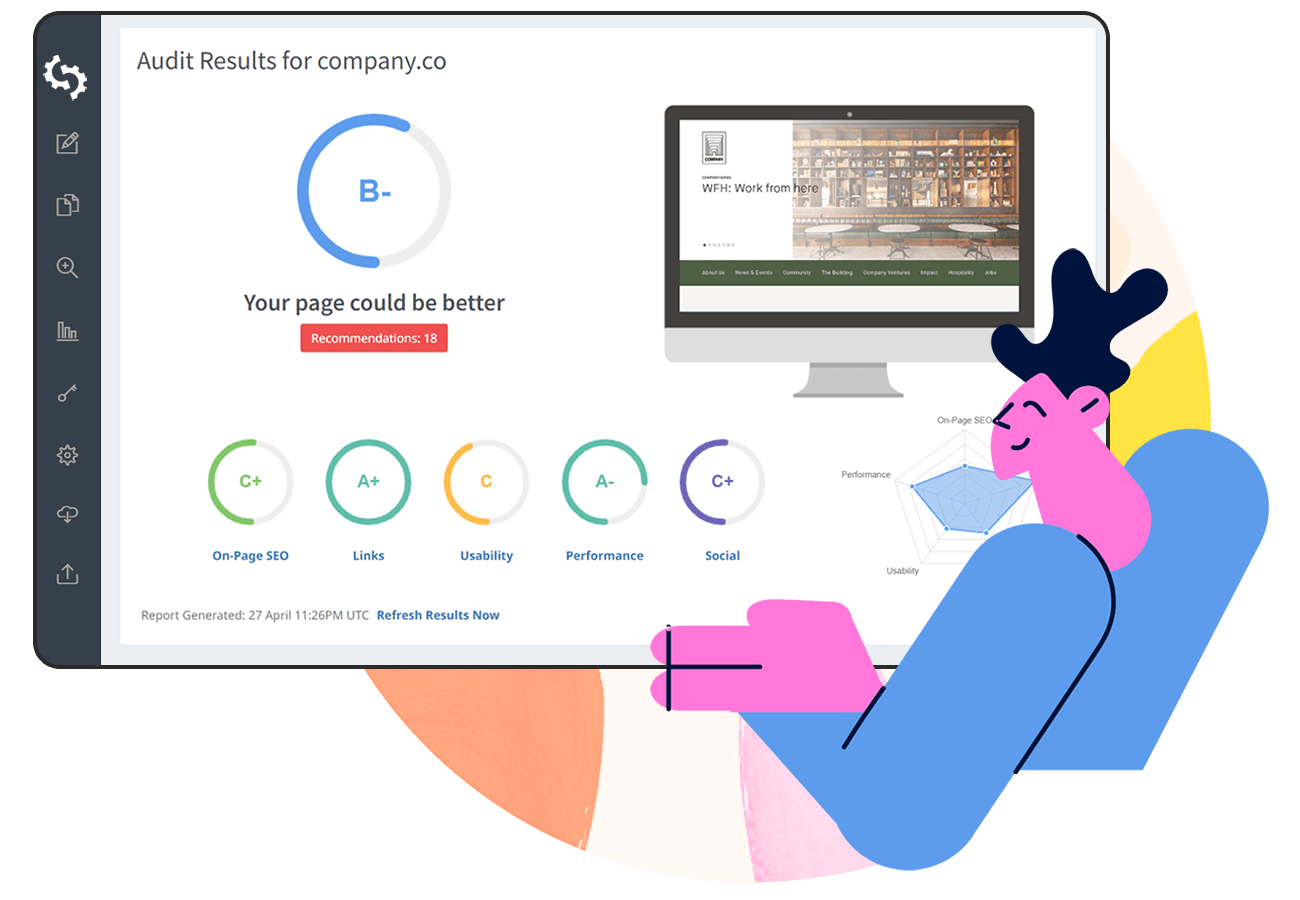
Our SEO Audit API is the most powerful way to scale the creation of fully-customized SEO audits and integrate advanced SEO reporting into your sales processes.
What does the SEO Audit API do?
SEOptimer generates thousands of SEO Audits per week via API for digital agency customers all around the world. The primary use case for agencies is the ability to programmatically create site audits on the fly, triggered as part of new business prospecting workflows.
Some agencies also built their own audit tools (either publicly offered or internal-only) and use SEOptimer's data points to supplement their other metrics.
But the SEO Audit API is not just for digital agencies, its also popular with researchers, publishers and developers who need access to SEO data points for thousands of websites at scale.
Our SEO Audit API returns full data extracts (70+ individual audit checks) and optionally the ability to download client-ready customizable report PDFs.

Getting Started with SEO Audit API in 3 easy steps
We put this guide together to serve as a walkthrough for how to test, configure and implement the SEO Audit API.
Step 1: Subscribe to an SEOptimer API Plan
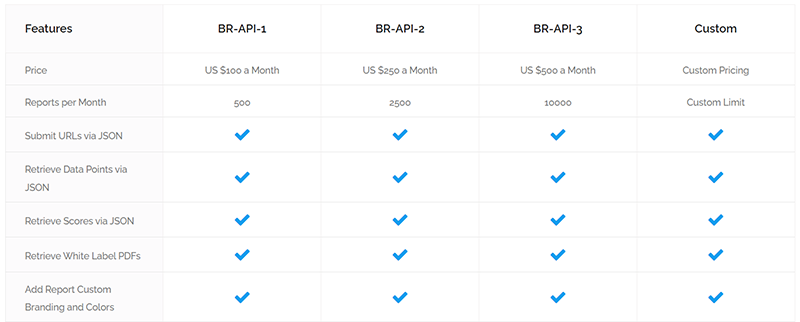
You'll need an SEO API Plan before you get started. The first decision to make is try to estimate how many reports you are likely to be requesting via the SEO API per month as this will determine which API Plan is best suited for your requirements. Our entry level API plan (BR-API-1) provides 500 monthly quota which enables you to create 500 reports per month.
On the other end of the spectrum, we have a Custom plan which enables very high volume of requests (>10,000 per month). You'll need to get in touch with us via live chat so we can better understand your use case and usage requirements. This will enable us to provide you with a custom price.
Remember, your monthly quota only counts how many reports you create (regardless of whether they include or exclude the PDF report). We don't count each report retrieval or each PDF download as part of your monthly quota.
All SEO API Plans contain all the same features. The only difference is the reports volume per month.
Step 2: Set up your Report Template
Before you implement the SEO Audit API into your workflow or application, it's useful to first set up your White Label Report Template since this determines the look and feel of your report and enables you to completely customize which checks are run.
If you aren't interested in the PDF-generated reports and are solely interested in the raw data extracts, you can skip this step. But we find the majority of our API users do utilize the PDF reports so it's an important first step.
Log into SEOptimer and click Report Templates. At the top of the page, you'll notice this message which is important to keep in mind in future:
"Please note, as you are an API user, any Report Settings changes you make will apply to API call responses. If you have active integrations dependent on particular data fields, it is possible these could break after applying changes."
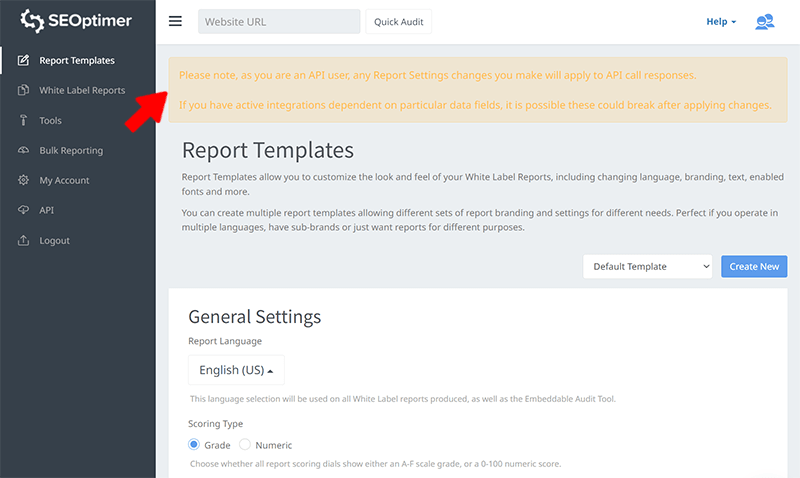
When you are creating a Report Template for the first time you won't need to worry but please do keep in mind that if you build integrations that are reliant on data points from SEO Audit API and you then modify the template by turning these data points off, your integrations will break.
On this page you can completely customize the look of the report, upload your logo, choose colors, fonts and turn on/off all the different checks.
Step 3: Test SEO Audit API in the Command Line
This is a great way to simply test the API and see exactly for yourself what the API returns so that you can start to think about how best to implement the API as part of your broader processes.
Testing in the Command Line is a quick and easy way to also verify everything is set up properly and working before you start integrating SEOptimer data with your systems.
To do this, open a new Terminal / Command Prompt window. This example was tested on a PC running Windows 11 (known as v10). The commands will be slightly different for Mac and Linux.
Create a Report
The simplest way to call the SEO API is to call SEOptimer API's create endpoint using curl:
curl -H "Content-type: application/json" -H "x-api-key: <INSERT YOUR API KEY>" -d "{\"url\":\"example.org\",\"pdf\":0}" https://api.seoptimer.com/v1/report/create
As a brief explainer on the syntax: -H stands for header and -d stands for data.
Define the application/json header and pass your SEOptimer API key (which can be retrieved from the API tab in SEOptimer):
-H "Content-type: application/json" -H "x-api-key: <INSERT YOUR API KEY>"
Then in the data array, define the URL you want to audit (remember to escape all quotation marks). You can also pass optional parameters to further customize your request:
- pdf:
- pass 0 (zero) if you do not want a PDF report included in the response
- pass 1 (one) if you want a PDF report file included in the response
- template:
- pass the Report Template ID (which can be found in the URL when viewing the template in SEOptimer)
-d "{\"url\":\"example.org\",\"pdf\":0}"
Finally, append the SEO API URL with the create endpoint:
https://api.seoptimer.com/v1/report/create

SEO API will return the following JSON response:
- success: true or false
- data:
- url: the URL you entered
- pdf: true or false whether you request a PDF report
- callback: true or flase
- template: if true, the template ID you requested for the report or flase
- id: a unique result ID for this request to lookup the report data
In the example above, I requested a report for "example.org" and it returned the result ID of 77285. I can now use this result ID to lookup the report data.
Once you receive a success value of true, we deduct 1 from your monthly API quota. You can check your API usage quota at any time from the API tab in SEOptimer.
Fetch the Result Data
Fetching result data does not reduce your monthly API quota. It is only the report creation process that costs quota.
To fetch the report data, call the get endpoint followed by the result ID which was returned in the previous step:
curl -H "Content-type: application/json" -H "x-api-key: <INSERT YOUR API KEY>" https://api.seoptimer.com/v1/report/get/77285
As before, within the request, define the application/json header and pass your API key.
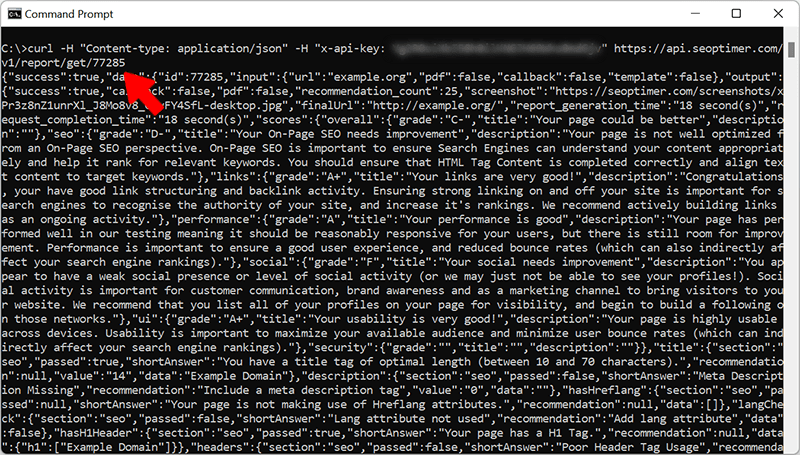
SEO API will return the following JSON response:
- success: true or false (please note: it does take our systems a few seconds to process a report. If you request the result data too quickly, you'll receive a success:false response)
- data: a long JSON response containing over 70+ audit checks
You can copy the entire response and paste it into a JSON formatter to better visualize all the checks and returned values:
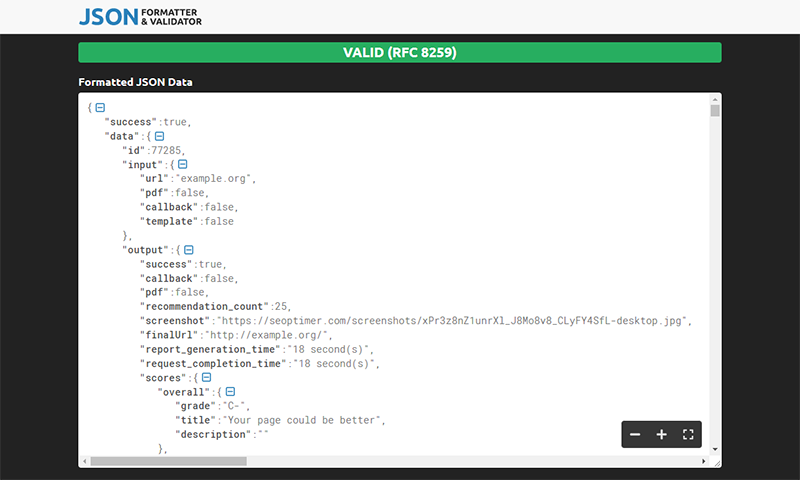
If you define PDF as 1, you'll see a download link in the output->pdf field.
As mentioned previously, using the command prompt and inputting URLs one by one is not the intended use case of SEO API - but rather a handy way to test the API quickly and explore all the returned data before building any integrations into your systems or applications.
You can also check our SEO API documentation on Postman.
Step 4: Plan Your Integration
Now that you know how to call the SEO API and understand what values are returned, you can start to plan how you'll integrate the SEO API.
Following are a few ideas for how SEO API can add value to your sales workflows or existing applications:
- CRM automation: when new business prospects are added to your CRM, based on certain attributes, you can use SEO API to automatically enrich the customer record with site audit data and generate an audit report on the fly
- Digital Marketing Dashboard: for organizations that already have a customer-facing app or dashboard, SEO API can be used to populate or enrich SEO 'widgets' in your application or be used in aggregated channel reporting
- Programmatic crawling: market researchers or industry journalists can use SEO API to audit many sites and return back site audit data points to be used in research studies or industry reports
Next Steps
The possibilities are endless with how you can leverage the data from SEO API. If you are planning an integration we recommend reaching out to us since our customer support team can help guide you through the process especially if you have an advanced use case or just want another opinion on how best to structure it. Get in touch with us via live chat in the bottom right of the screen.
